


















The short answer
Hand wash our silicone utensils with wooden handles in warm soapy water, rinse away food and soap, and let them dry before returning them to the holder. Clean the silicone head, wooden handle, and visible join as one utensil. Use hand washing rather than a dishwasher cycle, and wash promptly instead of leaving the wooden handles submerged.
Dinner’s done. Leave the tools ready for tomorrow.
A spoon streaked with tomato sauce, a spatula carrying the last of the cake batter: these are tools doing what you bought them to do. A straightforward cleanup keeps them ready for the next recipe without making their care another kitchen project.
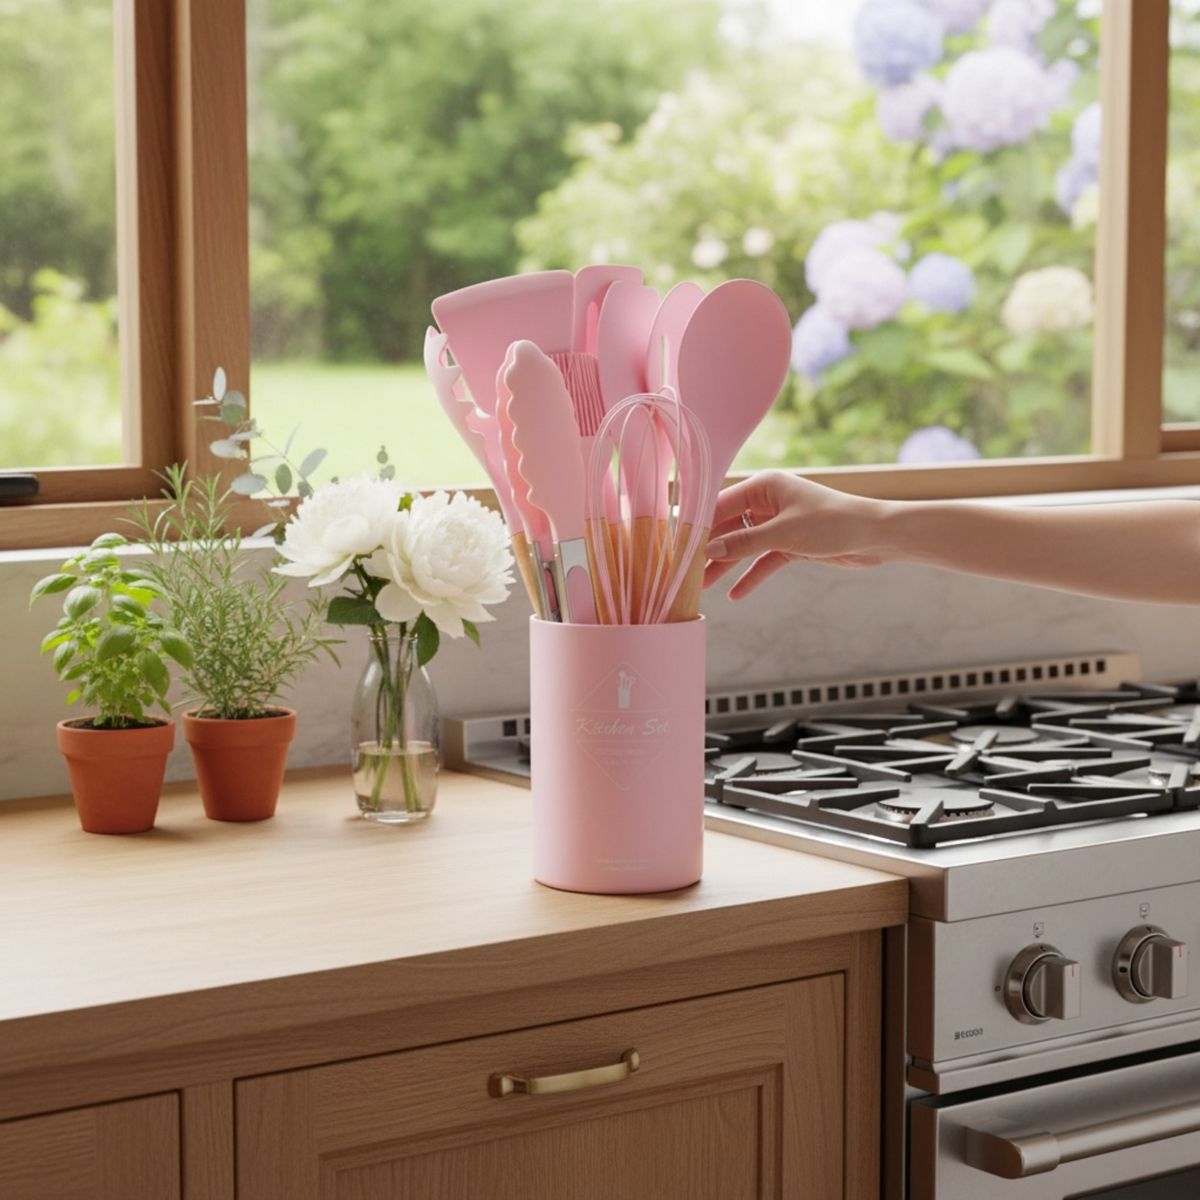
Our Food-Grade Silicone Kitchen Set pairs silicone heads with wooden handles and an included upright holder. The working ends suit familiar stirring and scraping tasks, while the holder gives clean utensils a place to return. The care routine starts with a warm-soapy-water hand wash and finishes when the tools are dry and put away.
For help choosing tools around the meals you make, visit our Home & Kitchen essentials guide. Here, we’ll concentrate on the part after cooking: washing the complete utensil, giving the handles room to dry, and keeping the holder ready for clean tools.
Can Silicone Utensils With Wooden Handles Go in the Dishwasher?
For our silicone-and-wood set, hand wash the complete utensil with warm soapy water. The silicone head doesn’t change the care routine for the wooden handle and the connection between them.
It’s tempting to think about the material touching the food first. But the handle travels through the same cleaning process as the working end. Treat the tool as one hand-wash piece rather than choosing a method for the silicone alone.
We would wash the utensils you used while finishing the rest of dinner cleanup, then leave them somewhere they can dry. Keep them out of any pot or pan you’re leaving to soak. That separates the utensils’ care from a longer soak intended for another item.
You don’t need a separate collection of cleaning products. Start with warm water, dish soap, a soft sponge or cloth, and a clean place for drying. The useful habit is completing that sequence—not finding a stronger treatment.
Wash the Tools You Used, From Head to Handle
Remove leftover food, wash every accessible surface, and rinse before moving the utensil to a clean drying space.
Start With the Food Left on the Head
Remove the remaining sauce, batter, or other food before washing. Work gently with the sponge rather than scraping the silicone with a knife or another sharp edge.
Turn the utensil as you clean it. A spatula can carry residue on its back as well as its working face, and a spoon needs attention around its edge and underside. Cleaning only the most obvious patch can leave the rest unfinished.
If a little food remains, work over that area again with the warm soapy water. Keep this a hands-on wash rather than leaving the entire utensil sitting in a sink of water while you move to another task.
Wash the Handle and the Join, Too
Wash what you held as well as what touched the food. Batter on your fingers, sauce near the top of the handle, or an oily grip all belong in the same cleanup.
Run the soft sponge around the accessible meeting point between the silicone head and wooden handle. Keep the utensil assembled while you work around the outside; pulling at the head isn’t part of this routine.
This is also a good reason to wash one tool at a time. You can see the surfaces, turn the handle comfortably, and finish the join without a pile of utensils hiding the parts that still need attention.
Rinse Before You Set the Utensil Down
Rinse the cleaned head, handle, and join with clean water to remove remaining soap and loosened food. NC State Extension’s kitchen-item cleaning guidance includes a clear-water rinse after washing.
Once the surfaces are clear, move the utensil to the drying area rather than returning it to a sink containing used cookware. Washing and rinsing finish one part of the job; drying needs its own clean space.
Let the Handles Dry Before You Put Them Away
Give washed utensils room to air-dry before grouping them in the holder. A clean drying rack makes this step easier to see and complete.
Michigan State University Extension includes air-drying kitchen items on a clean, sanitized dish rack in its cleanup guidance. For your everyday arrangement, leave space around the utensils instead of stacking wet wooden handles tightly together.
Let the silicone head, handle, and join finish drying. Don’t judge the whole tool by the first surface that looks dry, and don’t rush the last part simply because the counter is nearly cleared.
A rack beside the sink is a temporary stop, not a second storage system. Once the utensils are dry, you can return them to their usual place and reclaim that space.
Return Them to a Clean, Dry Holder
We recommend keeping the holder for tools that are ready to use again. Empty it while the utensils are out, and make sure the interior is clean and dry before putting them back.
If water has collected inside, empty it and let the holder dry separately. Don’t return dry handles to a wet base. The holder is shared by the whole set, so finishing this step matters as much as finishing the individual utensils.
During cooking, rest a used spoon or spatula on a washable spoon rest or a plate you already own—not among the clean tools. That gives used, drying, and stored utensils three clear places without buying another organizer.
Make Cleanup Fit the Meal
Wash the tools you used, give them a drying space, and return them when they’re ready. You don’t need to empty and wash an untouched set after every meal.
On a simple pasta night, that might mean a spoon for the sauce and tongs for serving. Keep the remaining clean tools in place. After serving, wash the used pieces and any others that picked up food or splashes.
For a baking session, more tools may need attention. Spread them out for drying rather than fitting every wet piece back into the holder at once. The sequence stays the same even when the number of utensils changes.
| Moment | Where the utensil belongs | Useful habit |
|---|---|---|
| Between stirring or serving | On a washable spoon rest or plate. | Keep used tools separate from clean ones. |
| After cooking | At the sink for its warm-soapy-water hand wash and rinse. | Clean the handle and join as well as the head. |
| After rinsing | In a clean drying area with space around the tool. | Let all parts finish drying before grouping them together. |
| Ready for the next meal | In a clean, dry holder or suitable dry storage. | Return the tools to a place you can reach comfortably. |
Place the holder on a stable part of the counter where you can reach it without leaning over active cooking. You can keep a favorite utensil you already own alongside the set; the aim is a useful arrangement, not a rule that everything must match.
When a Utensil Needs a Little More Attention
Give remaining food another gentle hand wash rather than escalating to a harsher treatment.
Work over the affected surface with warm soapy water and the soft sponge, then rinse so you can see whether the residue has been removed. Turn the utensil and look around its edges and accessible join before setting it aside to dry.
A bleach bath isn’t part of this everyday routine. Alabama Cooperative Extension cautions that bleach may damage wood. Stay with the hand-wash method rather than borrowing a stronger treatment intended for another surface or situation.
Keep cleanup at the sink, without boiling, baking, or pulling the utensil apart. Those aren’t extra steps you need to add to make an ordinary wash more thorough.
As you put the tool away, notice whether the head is secure and the surfaces are intact. Set aside a utensil with a loose head, torn silicone, or a splintered handle rather than returning it to the cooking rotation. Don’t turn damage into an improvised repair involving glue, sanding, or a stronger cleaner.
Is This Set Right for Your Kitchen?
Our silicone-and-wood set suits a kitchen where you want familiar cooking tools together in an upright holder and are happy to wash them by hand.
The silicone heads serve everyday stirring and scraping tasks. The wooden handles bring a natural texture to the tools you reach for, and the holder provides a consistent place for the clean set between meals.
The deciding care preference is straightforward: choose this set with a hand-washing routine in mind, rather than planning to put the complete utensils through the dishwasher. A little drying space beside the sink completes the arrangement.
Our recommendation
Choose our Food-Grade Silicone Kitchen Set for silicone working heads, wooden handles, and included countertop storage. We would start with the tools your next meal needs, keep a plate nearby for used utensils, and give washing and drying a clear finish before returning them to the holder.
There’s no need to retire a favorite spoon simply to make room for a coordinated set. Keep the tools that earn their place and arrange them around the way you cook.
Cook, wash, dry, return. A small routine for tools you reach for often.
Give the head and handle the same attention, leave room for drying, and keep the holder ready for clean utensils. If that sounds like your kind of kitchen routine, explore our silicone-and-wood set and choose the color you’d enjoy seeing beside your next meal.
Sources and Updates
This guide focuses on everyday care for our silicone-and-wood utensils. The linked university-extension references support rinsing after washing, air-drying kitchen items, and caution around bleach and wood. Their broader emergency-cleanup procedures are not additional instructions for this set. Publication and update dates appear with the byline.
Selected sources
Read more
Warm soapy water, a wide-mouth refill, and a place to dry. Keep our mist-and-pour bottle ready for the next meal without dishwasher cycles or improvised nozzle fixes.

Leftovers to the fridge, bags indoors, and room for ordinary errands. Follow our return-home routine for sorting belongings, refreshing the cabin bin, and cleaning and storing the trunk organizer.